Source to Image Deployments
There are some benefits of running Spring Boot applications on the Open Liberty runtime:
• Performance. Benchmarks have shows that Liberty perform better than Tomcat on both throughput and response time.
• Size. The memory footprint of Liberty is smaller than tomcat, but more importantly the Spring Boot libraries can be separated from the runtime libraries. When we look at the way Docker builds it’s images using layers, the application portion is much smaller if we build out images in the optimized way. This means faster build time, and if you’re storing every version of your application you build, the delta between versions is much smaller
• Support. If you’re running on OpenShift using IBM Cloud Paks, using the Liberty runtime is included in your licensing model, so using Liberty comes at no additional cost, but if need any support for Liberty it’s included. If you stick with standard Spring Boot with tomcat, you’ll have to either run on an unsupported platform, or pay for additional support for the tomcat runtime.
• Consistent runtime model. Running Liberty has many best practices especially in the Kubernetes/OpenShift world. There are built in metrics and monitoring tools which are specifically designed to be integrated into OpenShift. Using Liberty allows you to leverage many if these automatic connections to better maintain your environment.
How the Application was Modernized
In order to modernize the application from the Spring Framework to Spring Boot and Open Liberty running on OpenShift, the application went through code changes, build and deploy phases.
Code Changes
The process of making the code changes is outside of the scope of this document, however the general modernization process is described below:
• Spring Framework Upgrades
• Spring Boot Upgrades
• Spring Framework to Spring Boot
Build
The build phase created the Dockerfile for the application. The Pet Clinic Dockerfile for the self-contained jar is shown below:
FROM openliberty/open-liberty:springBoot2-ubi-min
COPY --chown=1001:0 spring-petclinic/target/spring-petclinic-2.1.0.BUILD-SNAPSHOT.jar /config/dropins/spring/
In order to optimize the Docker image, the Dual Layer Approach that has created is used and resulted in the Dockerfile shown below:
FROM openliberty/open-liberty:springBoot2-ubi-min as staging
USER root
COPY spring-petclinic/target/spring-petclinic-2.1.0.BUILD-SNAPSHOT.jar /staging/fatClinic.jar

RUN springBootUtility thin \
 --sourceAppPath=/staging/fatClinic.jar \
 --targetThinAppPath=/staging/thinClinic.jar \
 --targetLibCachePath=/staging/lib.index.cache

FROM openliberty/open-liberty:springBoot2-ubi-min
USER root
COPY --from=staging /staging/lib.index.cache /opt/ol/wlp/usr/shared/resources/lib.index.cache
COPY --from=staging /staging/thinClinic.jar /config/dropins/spring/thinClinic.jar

RUN chown -R 1001.0 /config && chmod -R g+rw /config
RUN chown -R 1001.0 /opt/ol/wlp/usr/shared/resources/lib.index.cache && chmod -R g+rw /opt/ol/wlp/usr/shared/resources/lib.index.cache

USER 1001
The containerized application was tested locally before the code and configuration files were committed to the git repository
Deploy
The deploy phase created the Jenkins, Kubernetes and Red Hat OpenShift artifacts required to automate the build and deployment pipeline for the application. For illustration purposes, the application was deployed to three different Red Hat OpenShift projects to simulate development, staging and production. The diagram below shows the flow through the pipeline
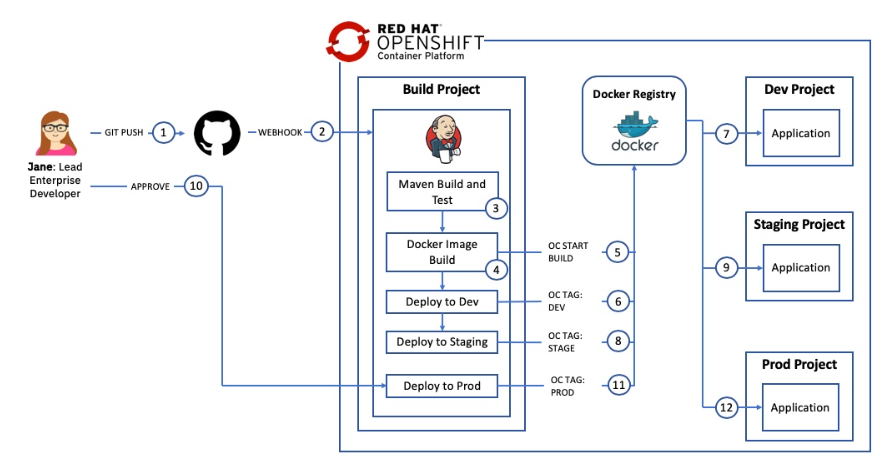
The steps were:
-
Configure the Red Hat OpenShift Cluster for WebSphere by creating the necessary SecurityContextConstraints definition. The file can be found here: scc.yaml
-
Create the Red Hat OpenShift build template that would be used to define the Red Hat OpenShift artifacts related to the build process including ImageStream and BuildConfig definitions. The file can be found here: template-libery-build.yaml
-
Create the Red Hat OpenShift deployment template that would be used to define the Red Hat OpenShift artifacts related to the Pet Clinic application including DeploymentConfig, Service and Route definitions. The file can be found here: template-libery-deploy.yaml
- Create the Jenkins Jenkinsfile for the pipeline. The Jenkinsfile defines the steps that the pipeline takes to build the Pet Clinic application, create an immutable Docker Image and then move the image through the dev, stage and prod environments. The file can be found here: Jenkinsfile
- Create the build project, load the build template and configure Jenkins
- Create the dev, stage and prod projects and load the deployment template
- Verify the pipeline.
Deploy the Application
The following steps will deploy the modernized Pet Clinic application in a Open Liberty container to a Red Hat OpenShift cluster.
Prerequisites
You will need the following:
- Git CLI
- Red Hat OpenShift 3.11 with Cluster Admin permissions
- oc CLI
- DB2 Database
Getting the project repository
You can clone the repository from its main GitHub repository page and checkout the appropriate branch for this version of the application.
git clone https://github.com/arun1252/cloudpak-for-applications.git
cd cloudpak-for-applications
git checkout spring
Create the Security Context Constraint
In order to deploy and run the Open Liberty Docker image in an OpenShift cluster, we first need to configure certain security aspects for the cluster. The Security Context Constraint provided here grants the service account that the Open Liberty Docker container is running under the required privileges to function correctly.
A cluster administrator can use the file provided here with the following command to create the Security Context Constraint (SCC):
cd Deployment/OpenShift
oc apply -f ssc.yaml
Create the projects
Four Red Hat OpenShift projects are required in this scenario:
- Build: this project will contain the Jenkins server and the artifacts used to build the application image
- Dev: this is the development environment for this application - Stage: this is the staging environment for this application - Prod: this is the production environment for this application
The file provided here contains the definitions for the four projects in a single file to make creation easier
Issue the command shown below to create the projects
oc create -f liberty-projects.yaml
Create a service account
It is a good Kubernetes practice to create a service account for your applications. A service account provides an identity for processes that run in a Pod. In this step we will create a new service account with the name websphere in each of the dev, stage and prod projects and add the Security Context Constraint created above to them.
Issue the commands shown below to create the websphere service account and bind the ibm-websphere-scc to it in each of the projects:
oc create serviceaccount websphere -n petclinic-liberty-dev
oc create serviceaccount websphere -n petclinic-liberty-stage
oc create serviceaccount websphere -n petclinic-liberty-prod
oc adm policy add-scc-to-user ibm-websphere-scc -z websphere -n petclinic-liberty-dev
oc adm policy add-scc-to-user ibm-websphere-scc -z websphere -n petclinic-liberty-stage
oc adm policy add-scc-to-user ibm-websphere-scc -z websphere -n petclinic-liberty-prod
Deploy Jenkins
Some Red Hat OpenShift clusters are configured to automatically provision a Jenkins instance in a build project. The steps below can be used if your cluster is not configured for automatic Jenkins provisioning:
oc project petclinic-liberty-build
oc new-app jenkins-persistent
Update the Jenkins service account During provisioning of the Jenkins master a service account with the name jenkins is created. This service account has privileges to create new artifacts only in the project that it is running in. In this scenario Jenkins will need to create artifacts in the dev, stage and prod projects. Issue the commands below to allow the jenkins service account to edit artifacts in the dev, stage and prod projects.
oc policy add-role-to-user edit system:serviceaccount:petclinic-liberty-build:jenkins -n petclinic-liberty-dev
oc policy add-role-to-user edit system:serviceaccount:petclinic-liberty-build:jenkins -n petclinic-liberty-stage
oc policy add-role-to-user edit system:serviceaccount:petclinic-liberty-build:jenkins -n petclinic-liberty-prod
Import the deployment templates
Red Hat OpenShift templates are used to make artifact creation easier and repeatable. The template definition provided here defines a Kubernetes Service, Route and DeploymentConfig for the CustomerOrderServices application. The gse-spring-deploy template defines the following: - service listening on ports 9080, 9443 and 9082 - route to expose the 9443 port externally - DeploymentConfig to host the Open Liberty container. - The image for the container is taken from the ImageStream that will be populated by the Jenkins pipeline. - environment variables are defined for the DB2 database used by the application allowing for environment specific information to be injected - Probes for liveness and readiness are defined to check port 9443 is active - The securityContext is set to allow read/write access to the filesystem and to run the container as user 1001 - The deployment will be updated if a new image is loaded to the ImageStream or if a change to the configuration is detected. Issue the commands below to load the template named gse-spring-deploy in the dev, stage and prod projects. ```oc commands oc create -f template-liberty-deploy.yaml -n petclinic-liberty-dev oc create -f template-liberty-deploy.yaml -n petclinic-liberty-stage oc create -f template-liberty-deploy.yaml -n petclinic-liberty-prod
## Create the deployment definitions
In this step the gse-spring-deploy template will be used to create a Red Hat OpenShift application named petclinic-liberty in the dev, stage and prod namespaces.

The result will be: - service listening on ports 9080, 9443 and 9082 - route to expose the 9443 port externally - DeploymentConfig to host the Open Liberty container. The deployment config will wait for a docker image to be loaded in to the ImageStream by the Jenkins pipeline.

Issue the following commands to create the applications from the template:
oc new-app gse-spring-deploy -p APPLICATION_NAME=petclinic-liberty -n petclinic-liberty-dev oc new-app gse-spring-deploy -p APPLICATION_NAME=petclinic-liberty -n petclinic-liberty-stage oc new-app gse-spring-deploy -p APPLICATION_NAME=petclinic-liberty -n petclinic-liberty-prod
## Import the build templates
In this step a template for the build process will be loaded in to the build project. The template provided here defines the following artifacts:
1.	An ImageStream for the application image. This will be populated by the Jenkins Pipeline
2.	An ImageStream for Open Liberty which will pull down the latest version of the openliberty/open-liberty:springBoot2-ubi-min image and will monitor DockerHub for any updates.
3.	A binary BuildConfig that will be used by the Jenkins Pipeline to build the application Docker image
4.	A jenkinsfile BuildConfig that defines the Pipeline using the Jenkinsfile in GitHub
5.	Parameters to allow the Open Liberty image and GitHub repository to be provided when the template is instantiated
Issue the commands below to load the template named gse-springboot-build in the build projects.
oc create -f template-liberty-build.yaml -n petclinic-liberty-build
## Create the build definitions
In this step the gse-springboot-build template will be used to create a Red Hat OpenShift application named petclinic-liberty in the build namespaces.
The result will be: - An ImageStream for the application image. This will be populated by the Jenkins Pipeline - An ImageStream for Open Liberty which will pull down the latest version of the openliberty/open-liberty:springBoot2-ubi-min image and will monitor DockerHub for any updates. - A binary BuildConfig that will be used by the Jenkins Pipeline to build the application Docker image - A jenkinsfile BuildConfig that defines the Pipeline using the Jenkinsfile in GitHub (with the URL provided as a parameter when the application is created)

Issue the following commands to create the application from the template:
oc new-app gse-springboot-build -p APPLICATION_NAME=petclinic-liberty -p SOURCE_URL=”https://github.com/arun1252/cloudpak-for-applications.git” -n petclinic-liberty-build
```
Run the pipeline
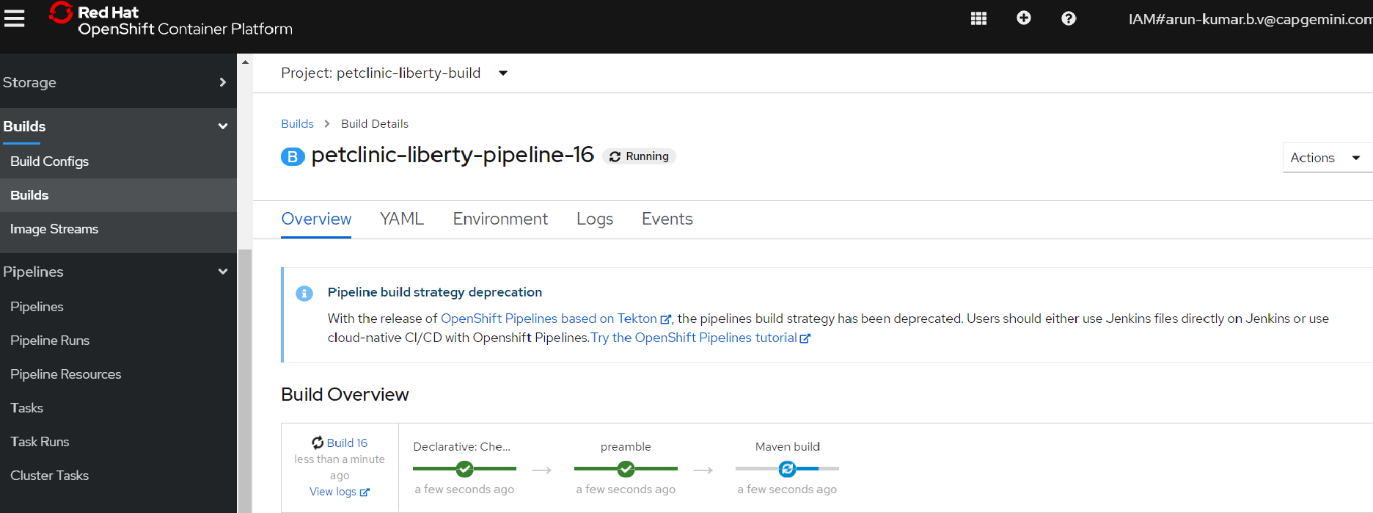
The newly created pipeline can be started from the Red Hat OpenShift console which allows access to the Jenkins logs but also tracks the progress in the OCP console.
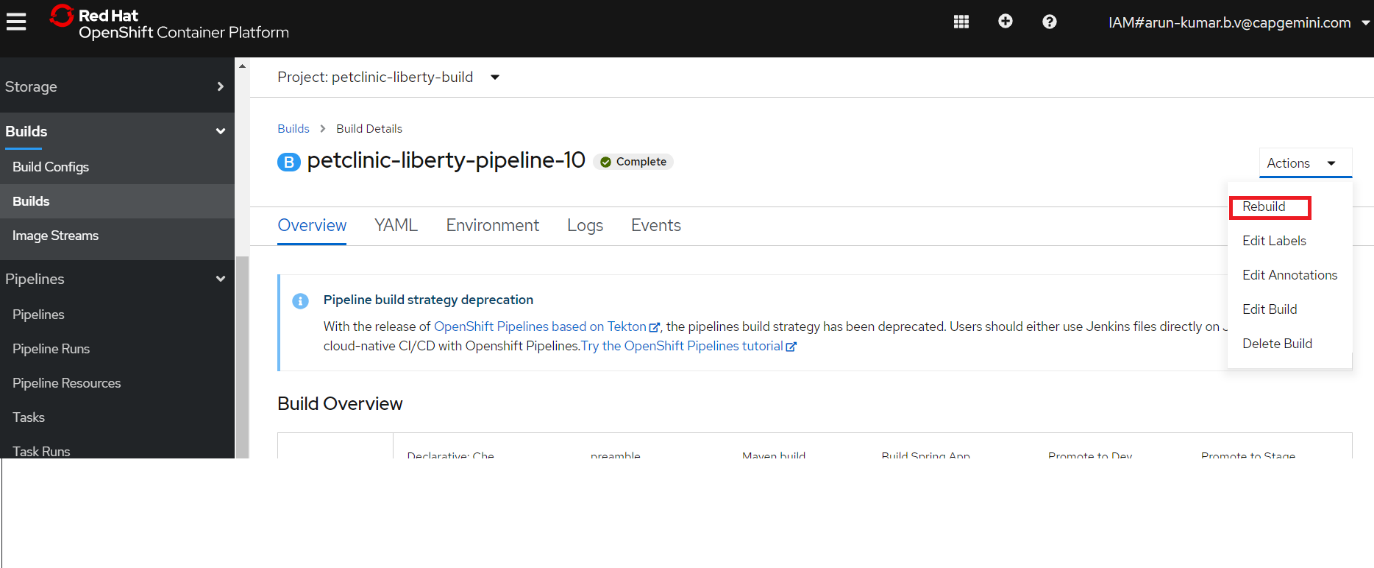
Navigate to Application Console –> Pet Clinic on Liberty - Build –> Builds –> Pipelines and click the Action and select start ReBuild
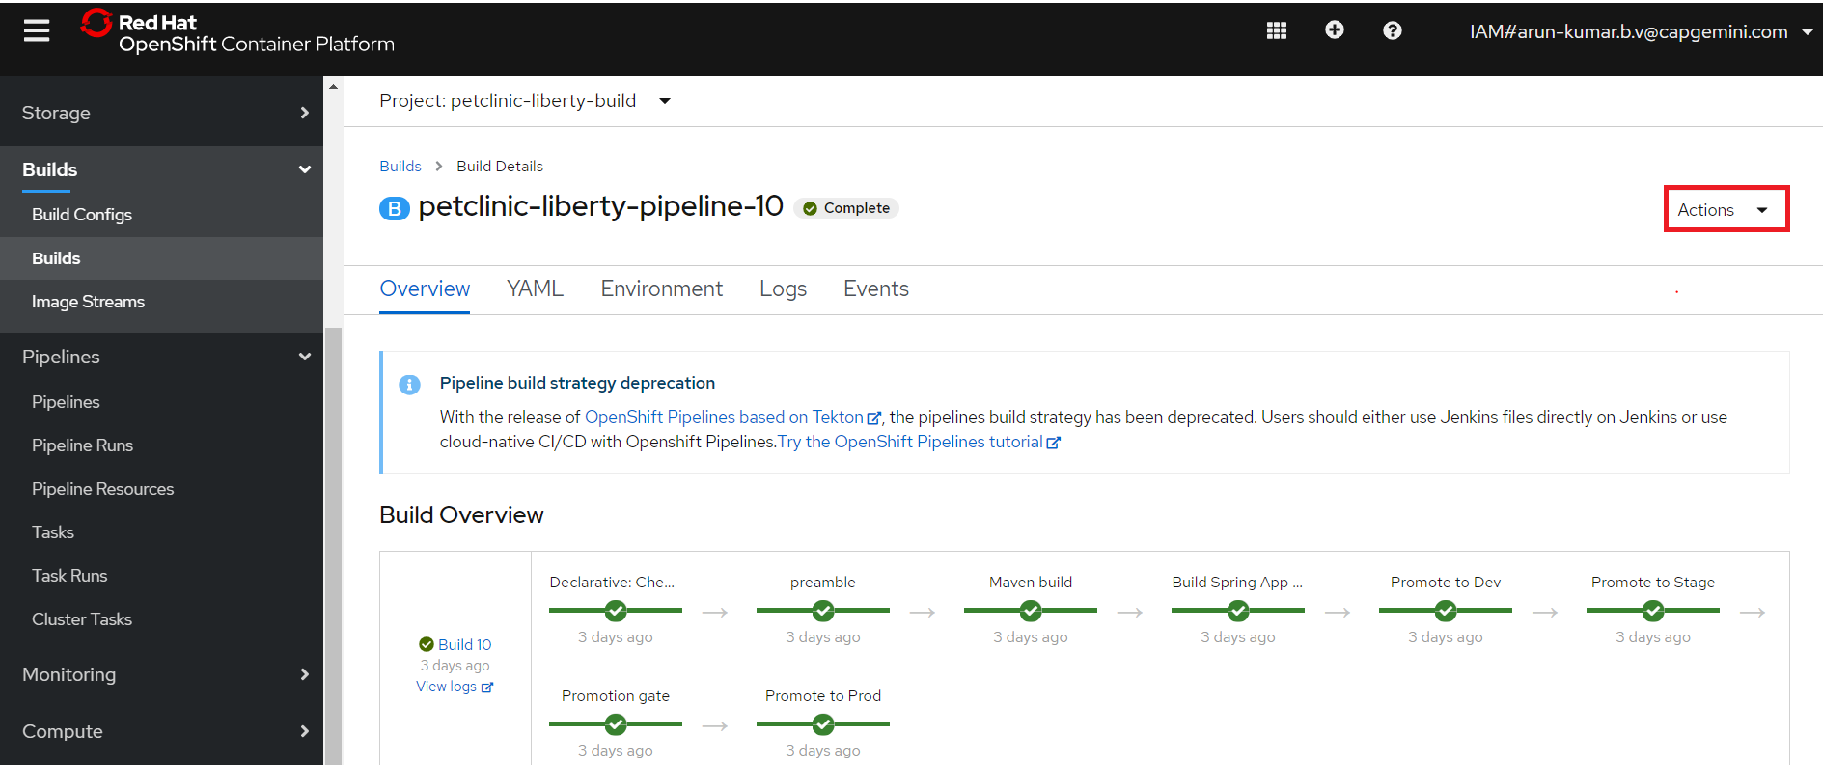
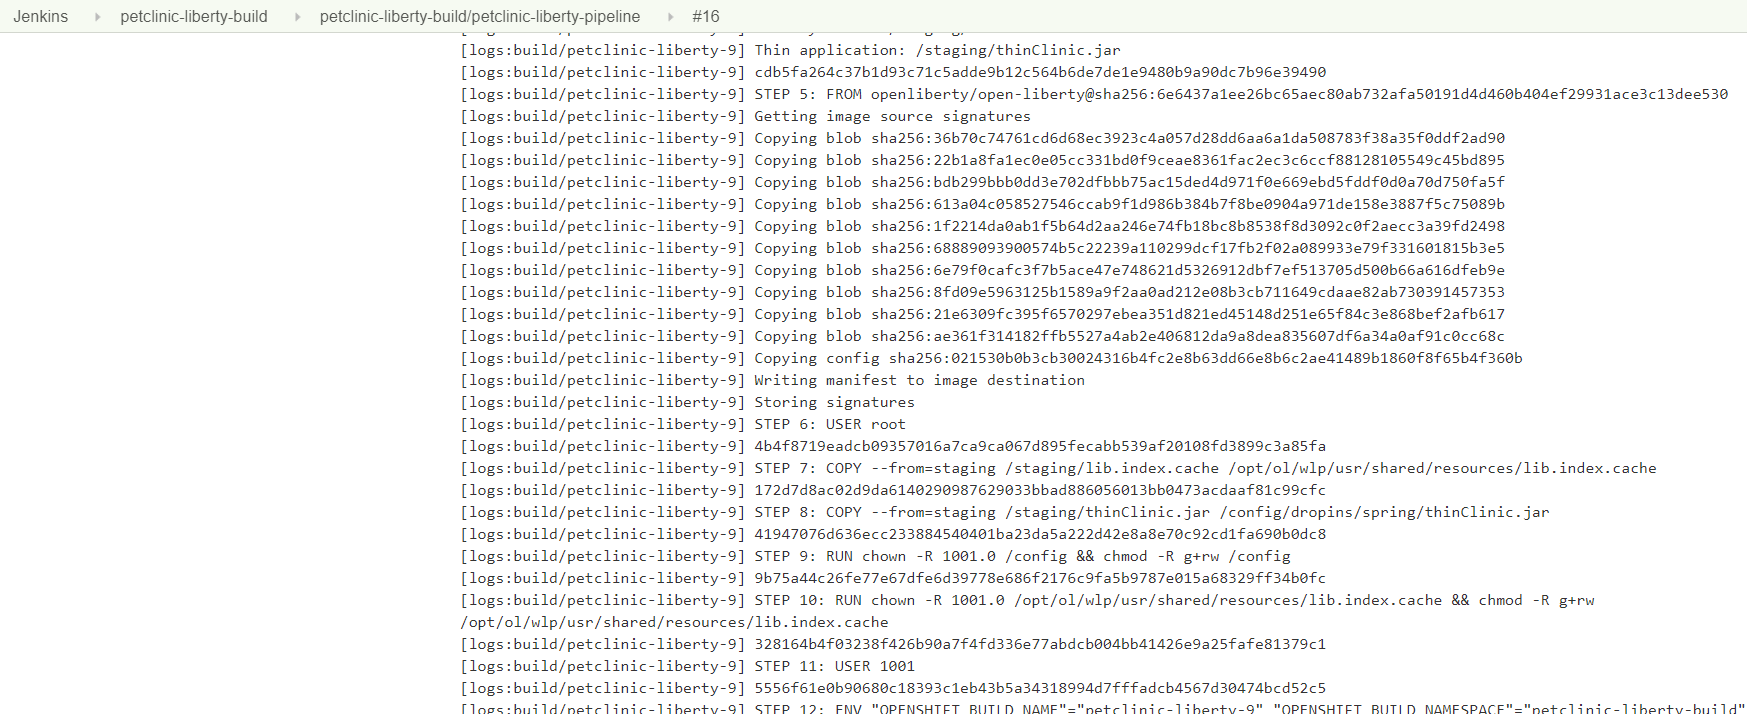
When the pipeline starts, click the view log link to go to the Jenkins administration console. Note that it may take a couple of minutes before the view log link appears on the first pipeline build

When prompted, log in with your OpenShift account and grant the required access permissions. The Jenkins console log will be displayed as shown below:
Return to the OpenShift Console and track the progress of the pipeline
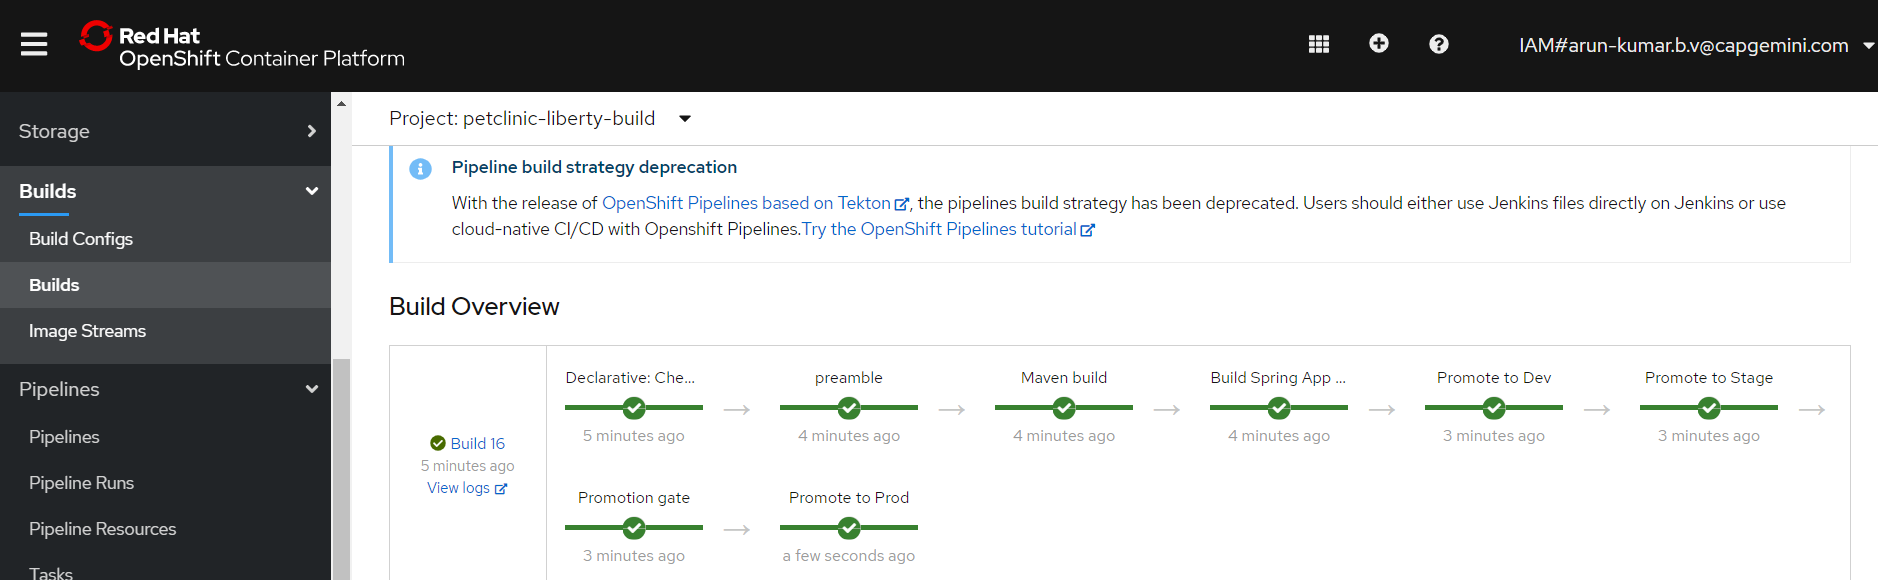
The pipeline will eventually stop at the Promotion Gate for approval to deploy to Production. Click the Input Required link as shown below

When the Promote application to Production question is displayed, click Proceed

Return to the OpenShift Console and validate that the pipeline is now complete
Validate the Application Now that the pipeline is complete, validate the Pet Clinic application is deployed and running in dev, stage and prod
In the OpenShift Console, navigate to Application Console –> Pet Clinic on Liberty - Dev –> Workloads –> Deployments configs

Information about the deployment will be displayed including the image that is being used (note the tag on the image as it will be the same in the stage and prod deployments). After a few minutes the container will be marked as ready

Click Networking –> Routes and click on the route for the application. Note that the URL is < application_name >-< project_name >.< ocp cluster url >. In this case the project name is petclinic-liberty-dev
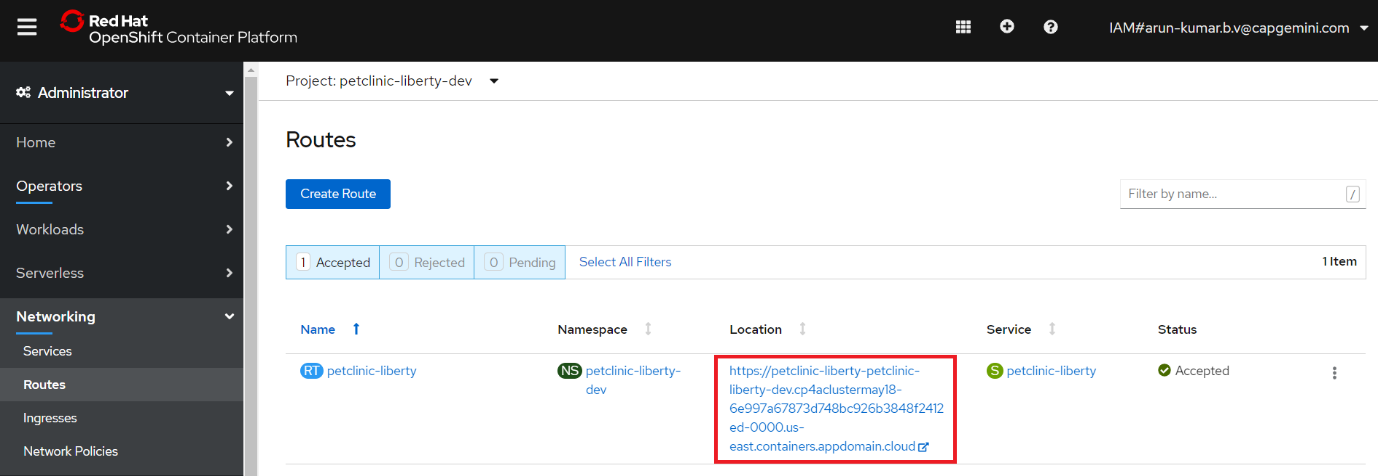
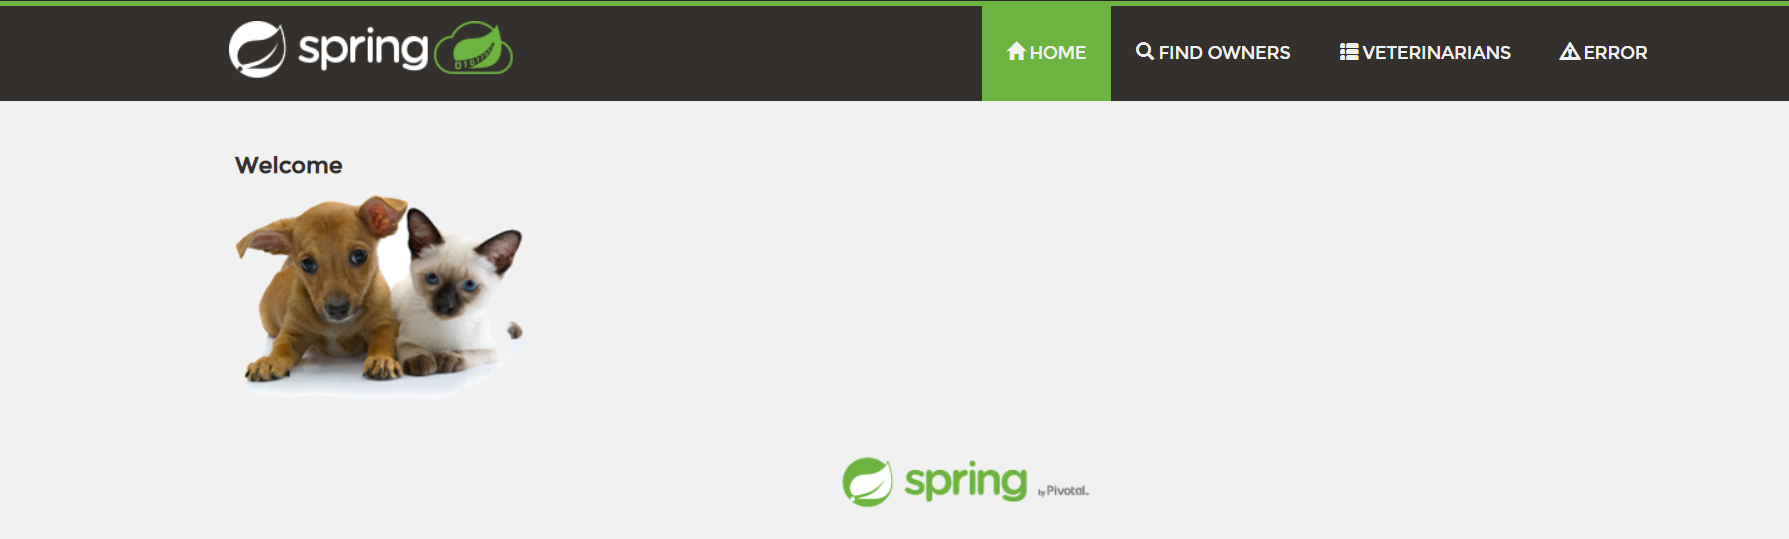
The application home page will be displayed. Click Find Owners and then Find Owner to view a list of owners from the database.
Repeat the validations for the stage and prod Projects.